
From plugging cables into the right ports to setting up Windows we take you through a step-by-step guide to setting up your PC. Start now with Stone Refurb.
Essential Tips for Setting Up A New PC
So you’ve got your new PC. You’ve unpacked all the boxes. And now you’re faced with a stack of cables and ports, half of which look identical, and no idea what to plug in where.
Getting your PC up and running is actually pretty simple. But there are a few key things to be aware of. To help you set up your computer, we've created this straightforward guide. It includes information on the common connections, ports, and cables found on computers.
But we haven’t stopped there. We’ve also included how to get Windows set up and running perfectly. And we’ve even covered how to find the apps you need and get things like cloud storage set up.
So whether you need some hints to get you over the line or you need a full walkthrough - we have you covered.
Let’s dive in!
- Ports and cables
○ Motherboard ports
○ Graphics card / GPU
○ Wifi card
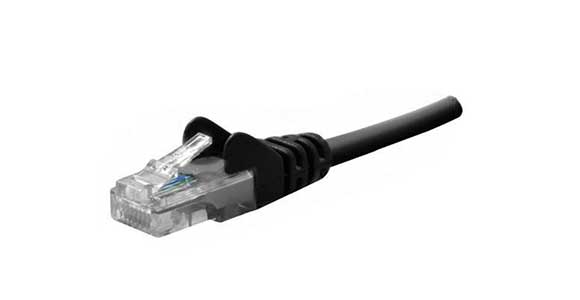
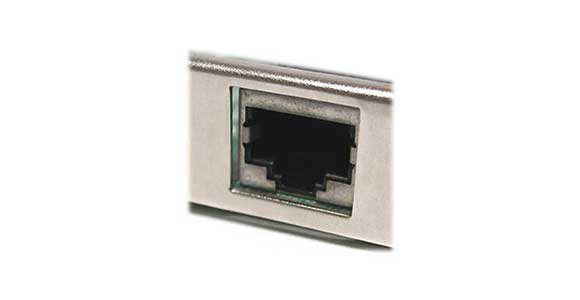
○ Wired internet
○ Other connections
○ Power supply
○ Monitor - Activate Windows
- Get your software set up
○ Security and antivirus/malware software
○ Windows update
○ Device drivers
○ Browser
○ Install your favourite apps
○ Set up your cloud storage
Ports and cables
Getting all the bits of your PC plugged in right is the first step - and it’s an important one. With so many ports on the back of your computer, it can seem a bit overwhelming but actually, it’s pretty easy. As long as you don’t try to force anything where it won’t fit you’re unlikely to go too wrong.
Here are a few tips to get you on the right track.
Have a look at the back of your PC
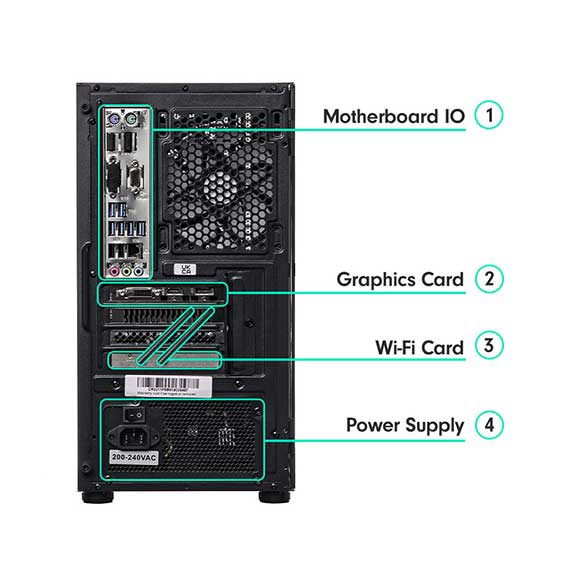
Most of the cables you need to plug into your computer will go in the back. This is great because it means you can tuck them out of the way under your desk or behind your screen. The downside is that you’ll have to root around on the floor or at the back of your desk to get everything set up. A small torch (like the one you have on your phone) can be super handy here.
Your PC probably won’t look exactly like this. Different motherboards and cards will have different setups. But it should be similar.
Motherboard ports
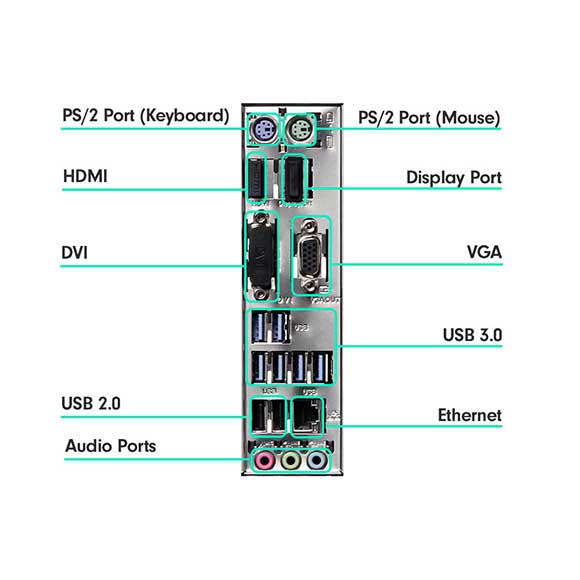
- Mouse and keyboard both go into USB ports. Any will do - the blue ones are faster USB 3 ports, but your mouse and keyboard will be fine with slower USB 2. Older PCs might have one or two PS2 ports. These are for a mouse and keyboard with a PS2 connector. USB is much more common.
- If you have a wireless mouse and keyboard with a dongle, this can plug into any USB port. If they’re Bluetooth - or you have Bluetooth headphones or speakers - you’ll need to set these up in Windows later.
- Speakers, headphones and microphone can go into the audio ports. SPDIF is an optical audio connector that offers higher quality with compatible devices.
- If you don’t have a separate graphics card (see below) you’ll plug your screen into the motherboard too. Just match the connector on your monitor to the one on the computer.
Graphics card / GPU
If you have a gaming PC or workstation then you’ll probably have a separate graphics card. If you have one, this is where you should plug in your screen - NOT directly the motherboard. If you do that you’ll miss out on all the incredible processing power of your GPU.
Depending on your computer you could have several different screen connectors. You’ll need to match the connector to the one on your screen for the best performance. Converters are available, but you’re best sticking to matching connectors if you can. If you bought your computer in a bundle from us you won’t need to worry as we supply all the cables you need.
You might find a plastic connector in some or all of these ports when you first set up your PC. These are just there for protection in transit. You can remove them by pulling them out.
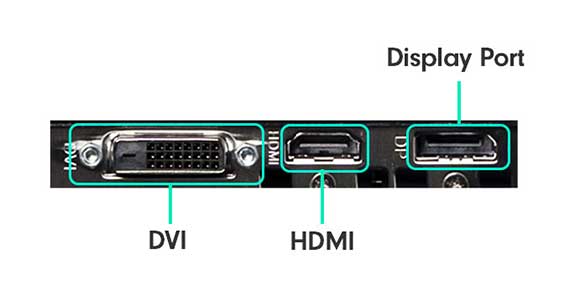
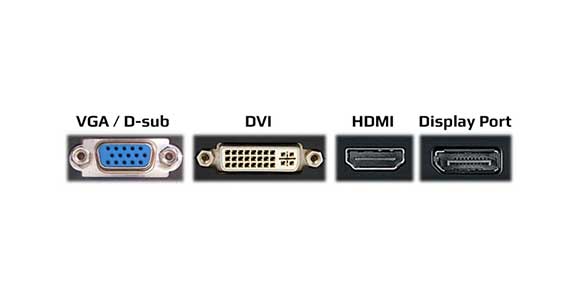
Here are some of the most common connectors:
- VGA/D-sub is getting very old, and should only be a last resort. You won’t get great performance at 1080p (full HD) and you won’t be able to use 4k at all.
- DVi is the successor to VGA. It will work fine at 1080p, but it’s limited to 30Hz at 4k. This means you won’t be able to get high refresh rates in games.
- HDMI is the current standard. There are actually several different versions of HDMI. For standard HD, anything above HDMI 1.4 will be fine. For high frame rate gaming at 4k, you’ll need HDMI 2 or better. HDMI 2.1 is technically very good, but is not currently very widely supported.
- DisplayPort is a step up from HDMI, especially if you want to run high resolutions or refresh rates. The most recent DisplayPort 2.0 is the best quality connection you can get but is rare and expensive.
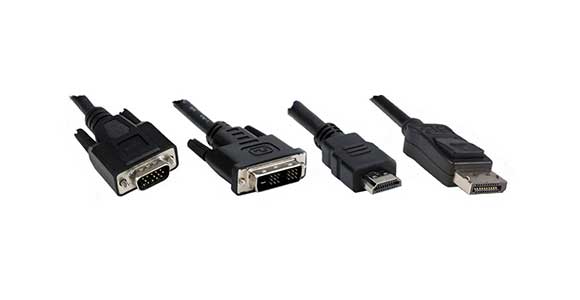
And this is what they look like:

Other connections
You might have more connectors on the front, top or sides of your computer. Usually, these will be extra USB ports or sometimes headphone and speaker jacks. You can use these for devices you don’t leave in all the time - like thumb drives or headphones. It’s worth checking what type of USB ports they are. If you’re copying files from a thumb drive or memory card you’ll get much faster transfer speeds with USB 3.
Power supply
It’s generally good practice to plug this in last so you’re not rooting around the back of your PC while the power is on. Almost everything you plug in should be hot-pluggable. That means you should be able to insert or remove it while the PC is on. But it’s a good habit to avoid doing this with anything other than USB devices.
Once you've plugged everything in you’re all good to power on your computer. Remember there will be a power switch on the back, on the power supply, as well as the one on the front. The back one can stay on all the time, but if it’s off nothing will switch on.
Get your monitor plugged in
To get your screen up and running you’ll first need to get it plugged into the wall. Make sure you use the power cable that came with it to avoid any damage. Then you’ll need to plug the other end of the cable from your video output into the monitor.
If you have any other powered accessories - like speakers or external hard drives - you’ll need to plug these in too.
Then you’re good to go.
Activate Windows
Once you've plugged everything in it’s time to turn your new PC on. But you’re not quite done with setting up yet - there are a few more things you need to take care of. And you can do the first of these as soon as your computer gets through its boot sequence.
You need to activate Windows.
We have a handy Windows 10 activation guide but the process is similar for all versions of Windows. All you need to do is follow the prompts on the screen, selecting the correct options for you.
Select your region
Windows will have a guess at where you are in the world. If it’s right that’s great - just click on ‘yes’ to continue. If not, you’ll need to scroll through the list and find your location.
Confirm your keyboard
Windows will base your keyboard layout on your location, so you shouldn't need to change this. Make sure it’s correct, and click 'yes' to continue.
Accept the End User License Agreement
Make sure you read through the licensing terms so you understand what you’re agreeing to. When you’ve done this, click ‘accept’ and you’re done - Windows will boot up.
Security and antivirus/malware software
Before you do anything else it’s worth making sure your PC is protected. For most people, the security software that’s built into Windows will do a great job. It’s a pretty robust solution and will keep itself up to date without you having to worry about it. It’s also included with Windows.
You can access Windows Security on Windows 10 or Windows 11 by clicking the shield icon in the system tray. The system tray is located at the bottom right of the screen, next to the clock. You might need to click on the little ^ symbol to show all of your icons.
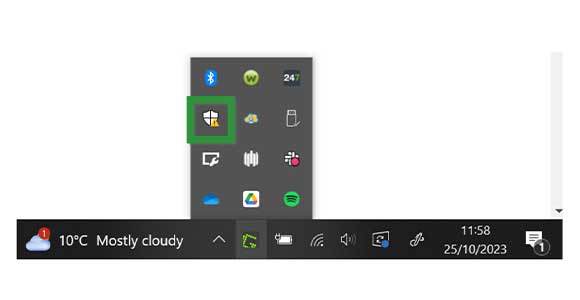
When you click on it, a window will appear with icons for different parts of your computer's security. If these icons have a green tick next to them then that’s great - everything is good and you don’t need to do anything. If there’s a yellow exclamation mark you need to take action. Follow the on-screen instructions and you’ll be safe and secure in no time.
Once you’re set up, if Windows Security needs you to do anything it’ll pop up a little message. It’ll also have a little yellow triangle over the icon in the taskbar.
Windows update

Once your security settings are all sorted the next thing you’ll want to do is make sure Windows is up to date. Microsoft releases updates regularly, so there’s a good chance you’ll have a few to install. Sometimes these are simple security fixes or device driver updates. Sometimes they're large feature updates that can transform how Windows works.
It's likely your PC will prompt you to update soon after you first boot up. If that’s the case just follow the on-screen instructions and you’ll soon be up to date. If not, you might need to check yourself.
Checking for updates is super simple - and it’s a good way to introduce a handy Windows concept too. You could click on the Windows button in your taskbar then find the Windows Update screen in the menu. But there’s a much easier way.
Press the Windows key on your keyboard or click the Windows button on your taskbar and type ‘update’. You’ll see that Windows finds the best match in ‘Check for updates’. This is exactly what you want, so all you need to do is press enter. You can then press the ‘Check for updates’ button and follow the instructions to get your PC all up to date.
Device drivers
Drivers are pieces of software that help Windows communicate with your hardware. Most of your hardware will already have drivers built-in to Windows. These will have updated in the last step. If you have more specialist hardware like a gaming GPU or a fancy mouse it might need special drivers.
If you’ve bought something new then you should have instructions on how to find drivers in the box. If you’ve bought a gaming PC from us then we’ll have installed them for you, so you’re good to go.
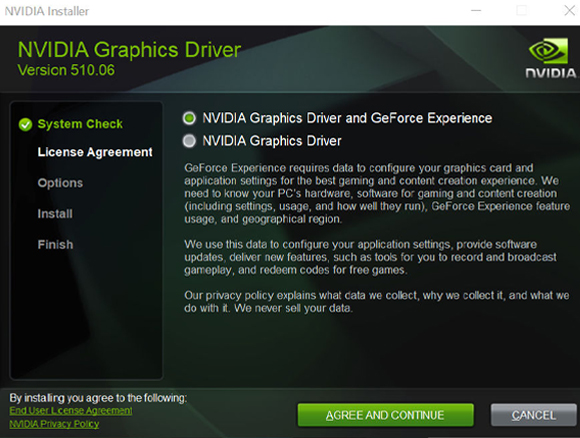
To find drivers for a graphics card visit the drivers page on the manufacturer’s website. Nvidia makes Geforce cards and AMD makes Radeon cards. Both have apps that will auto-detect the card you have, and direct you to the correct drivers. They’ll also let you know when new, updated drivers are available and prompt you to install them.
It’s important that you install the correct drivers for hardware like graphics cards. Windows will use generic drivers to get you up and running. But to get all the performance benefits of a specialist card you’ll need dedicated drivers.
If a piece of hardware isn't working right, a driver update should always be one of the first things that you try.
Browser
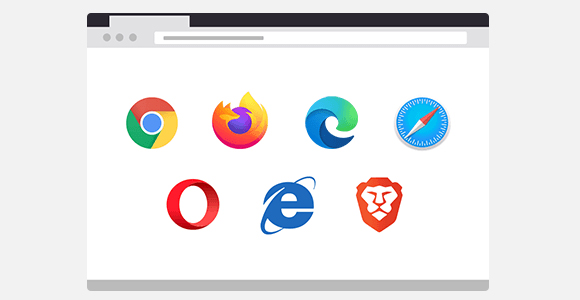
If you have a favourite browser, now’s the time to get it installed. Windows 10 and 11 both come with the Edge browser pre-installed and ready to use, and it’s not a bad option. It’s fast and efficient, but it doesn’t have many extensions available. This might not be a problem for you, but if it is then you’ll need to consider another browser.
Google’s Chrome browser is good, with lots of extensions available. It’s also quite resource-intensive. This means it might not be the best choice for lower-spec computers.
Opera is much lighter on resource use - it won’t take up much space on your hard drive, and it doesn’t need much RAM to run.
UR Browser is also reasonably lightweight but has a focus on security and privacy. So if that’s something that worries you, it might be a good choice.
There are plenty of other options too, including Firefox and Brave . The good news is that they’re all free, so you can try a few different options and see what you like best. Most browsers will sync your passwords and have mobile versions too.
Install your favourite apps
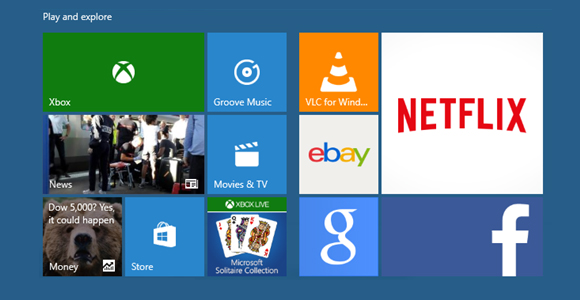
Next up it’s time to get your apps installed. Make sure when you do this that you’re going to the official software websites to install. Unofficial sites might install malware or additional software that you don’t want.
If you want to make your life easy by installing several apps in one go then ninite.com is super handy. Pick the apps you want to install and click the ‘Get Your Ninite’ button, and it’ll install them for you all in one go. There are lots of popular free and open-source apps to choose from including Google Drive, Spotify, Blender, Chrome, Zoom and VLC.
It’s worth bearing in mind that MS Office (that includes Word, Excel and other useful apps) is not included with Windows - you have to buy it separately. If you need Office, you’ll need a subscription.
That said, you can access all of the Office apps online for free with your Microsoft account. Google also offer a great free alternative with their Docs suite of apps.
Set up your cloud storage
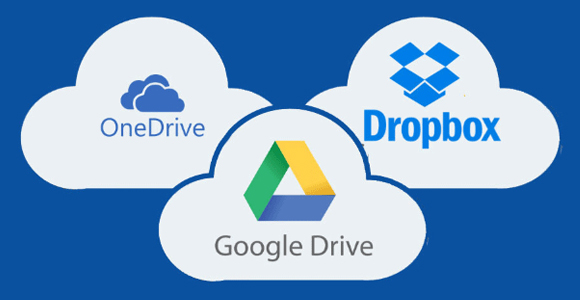
Cloud storage is a place to keep your files and documents on the internet. It’s handy because it means you can access your files from any computer, anywhere. It also works as a kind of backup solution (though we wouldn’t recommend relying on cloud storage alone). If your PC has a problem, you’ll be able to access your documents in the cloud and restore them to another machine.
When you set up your Windows account, you’ll get a free OneDrive account. This will give you 5 GB of storage space for free. This might be enough if you’re a very light user, but it can start to fill up very quickly if you’re storing photos or videos.
If you sign up for a free Google account, you’ll get another 15 GB of free storage. You’ll need to juggle your files between two clouds which could be a pain, but it might be enough for you. There are a few other free cloud accounts you can use too, like Dropbox and Box. But if you’re running out of space you might need to upgrade to a paid service.
All the providers offer a paid service with a huge upgrade in storage space. These have a monthly payment (usually around £8 to £10).
Whichever one you choose, make sure you install the app on your computer. This can be set up to sync the folders you want backed up. Usually, these will be your documents folders (Documents, Pictures, Videos and Music) and your desktop folder. Remember anything outside of these folders won’t be synchronised to the cloud.
You can also install your cloud storage on your phone if you like. You can back up your phone’s data to it (very handy if you take a lot of photos and videos). You’ll be able to access all the synced files on your PC from there too.
Enjoy your new PC!

We’ve barely scratched the surface of what you can do with your new computer here. But if you’ve followed this guide you’ll have a well-set-up PC that’s the perfect base for whatever you want to use it for.
You’ll be protected from viruses and malware and your computer will be running sweet and smooth. And you’ll have all your favourite apps up, running and ready to go.
It might seem like a bit of a faff to jump through all these hoops before you can use your new PC but it’s worth the effort. It means you won’t realise further down the line that you’ve forgotten to do something important.